.png)
Easy Snowflake Databricks workflow with Snowflake

Michael Tuijp
Geospatial Data ScientistThere are many ways to query data. As we explained in our previous article 'Easy Snowflake-Python connections to BAG data and Snowpark', we used Snowflake to load BAG data from the Snowflake Marketplace directly into a local Jupyter notebook. But what if you could run the query directly in your Azure Cloud environment and run it automatically on a schedule of your choosing with a single click? That is possible with Databricks! Enter Databricks!
What is Databricks?
Databricks was founded to provide an alternative to the MapReduce system and provides a just-in-time cloud-based platform for customers processing big data. Databricks was created to help users integrate the fields of data science, engineering and the business behind it into the machine learning lifecycle. This integration helps facilitate the processes from data preparation to experimentation and deployment of machine learning applications.
According to the organisation behind databricks, the databrick platform is 100 times faster than the open source Apache Spark. By unifying the pipeline involved in the development of machine learning tools, Databricks is said to vesnell development and innovation and increase security. Data processing clusters can be configured and deployed with a few clicks. The platform includes several built-in data visualisation features to display data in graphs.
Using Databricks
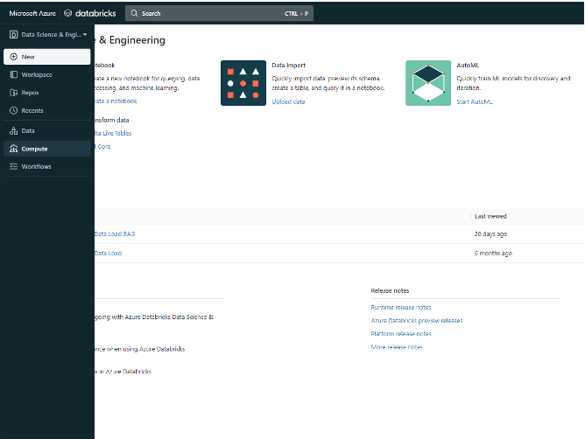
Once you have started Databricks, go to the 'Compute' tab in the left-hand bar.
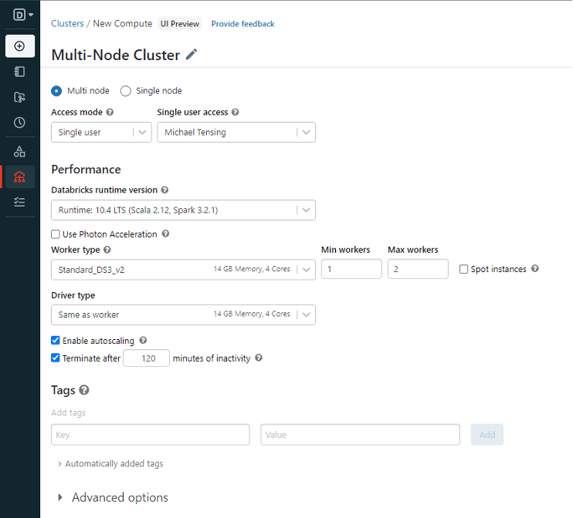
There you see the setup screen for creating a cluster, which is quite simple. By default, the cluster is set as a 'Multi node cluster', which as the name suggests uses multiple nodes in parallel. This is useful to use for very large amounts of data.
For our example, we mostly use the default settings. The only thing you might want to change (related to the availability of computing power within your organisation) is the minimum and maximum number of workers required.
Using the Standard_DS3_v2 Worker type with minimum 1 worker and maximum 2 workers should give sufficient memory during our example.
That's it! You are now ready to run Python Notebook in Databricks.
Upload your Jupyter Notebook
Now it is time to load our Jupyter Notebook, the .ipynb file. Click on the tab 'New' and create a new notebook, then click on the tab 'File'. From here, click 'Import Notebook' and browse to the .ipynb file you saved in the previous article (or you can download the file here).
Great, you've uploaded the notebook into Databricks! The only line of code to add is the one below. Since we are working on a cluster in a Cloud, we still need to install the required packages on it. In our case snowflake.snowpark.python.
!pip install snowflake.snowpark.python
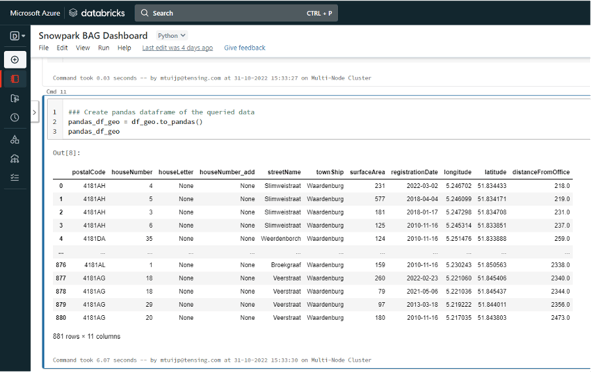
After running that code, you can run the rest of the code in exactly the same way as in Jupyter Notebook. This will give you exactly the same results.
Setup of a Notebook in pipeline
Now that we have produced the same results as in our Jupyter Notebook example, let's go one step further. Since we are running our notebook with Databricks, we can follow some very simple taps to run this notebook periodically in our Cloud environment without human intervention.
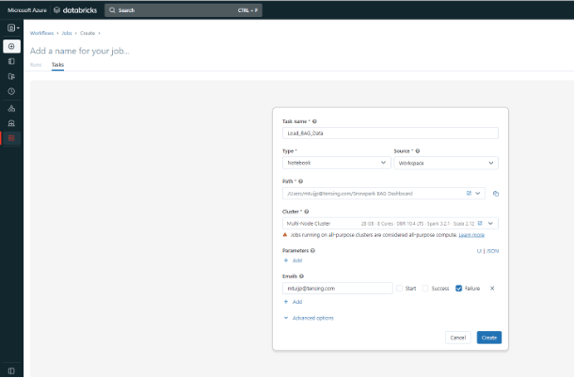
In the main bar on the left, go to the bottom tab 'Workflows'. From there, click on 'Create Job' and you will see the screen below. Here, enter Notebook under 'Type' and Workspace under 'Source'. Next, select the path to your notebook and the cluster we just created. In addition, you can use some advanced options to, for example, choose to send an e-mail to someone in case of failure.
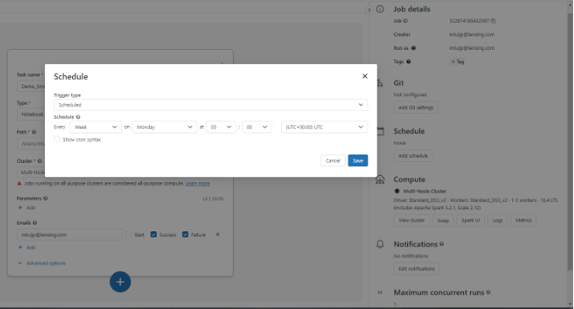
After setting the task, you can also schedule your notebook to run periodically on a specific day and time. After creating it, right-click 'Schedule', which takes you to the screen below. Here you set exactly when and how often you want the notebook to run.
Congratulations! Not only have you created a notebook within Databricks that connects to a public BAG dataset in Snowflake, but you have also set up an automatic workflow to run the notebook at specific time intervals. What used to require quite a few complex operations now takes just a few clicks!
If you want to know more about possible applications like this, contact us. We will be happy to help you!